Setting up your refurbished bike
If your bike was delivered in a cardboard box, you’ve come to the right place.
Before you can hop on the saddle, there are just a few things you need to do to get your bike ready to ride. Don’t worry — we’ll show you exactly how it’s done! If your bike arrived with the handlebars turned sideways, go to assembly instructions for bikes with turned handlebars.
4 steps to your test ride
1. Unpack the bike
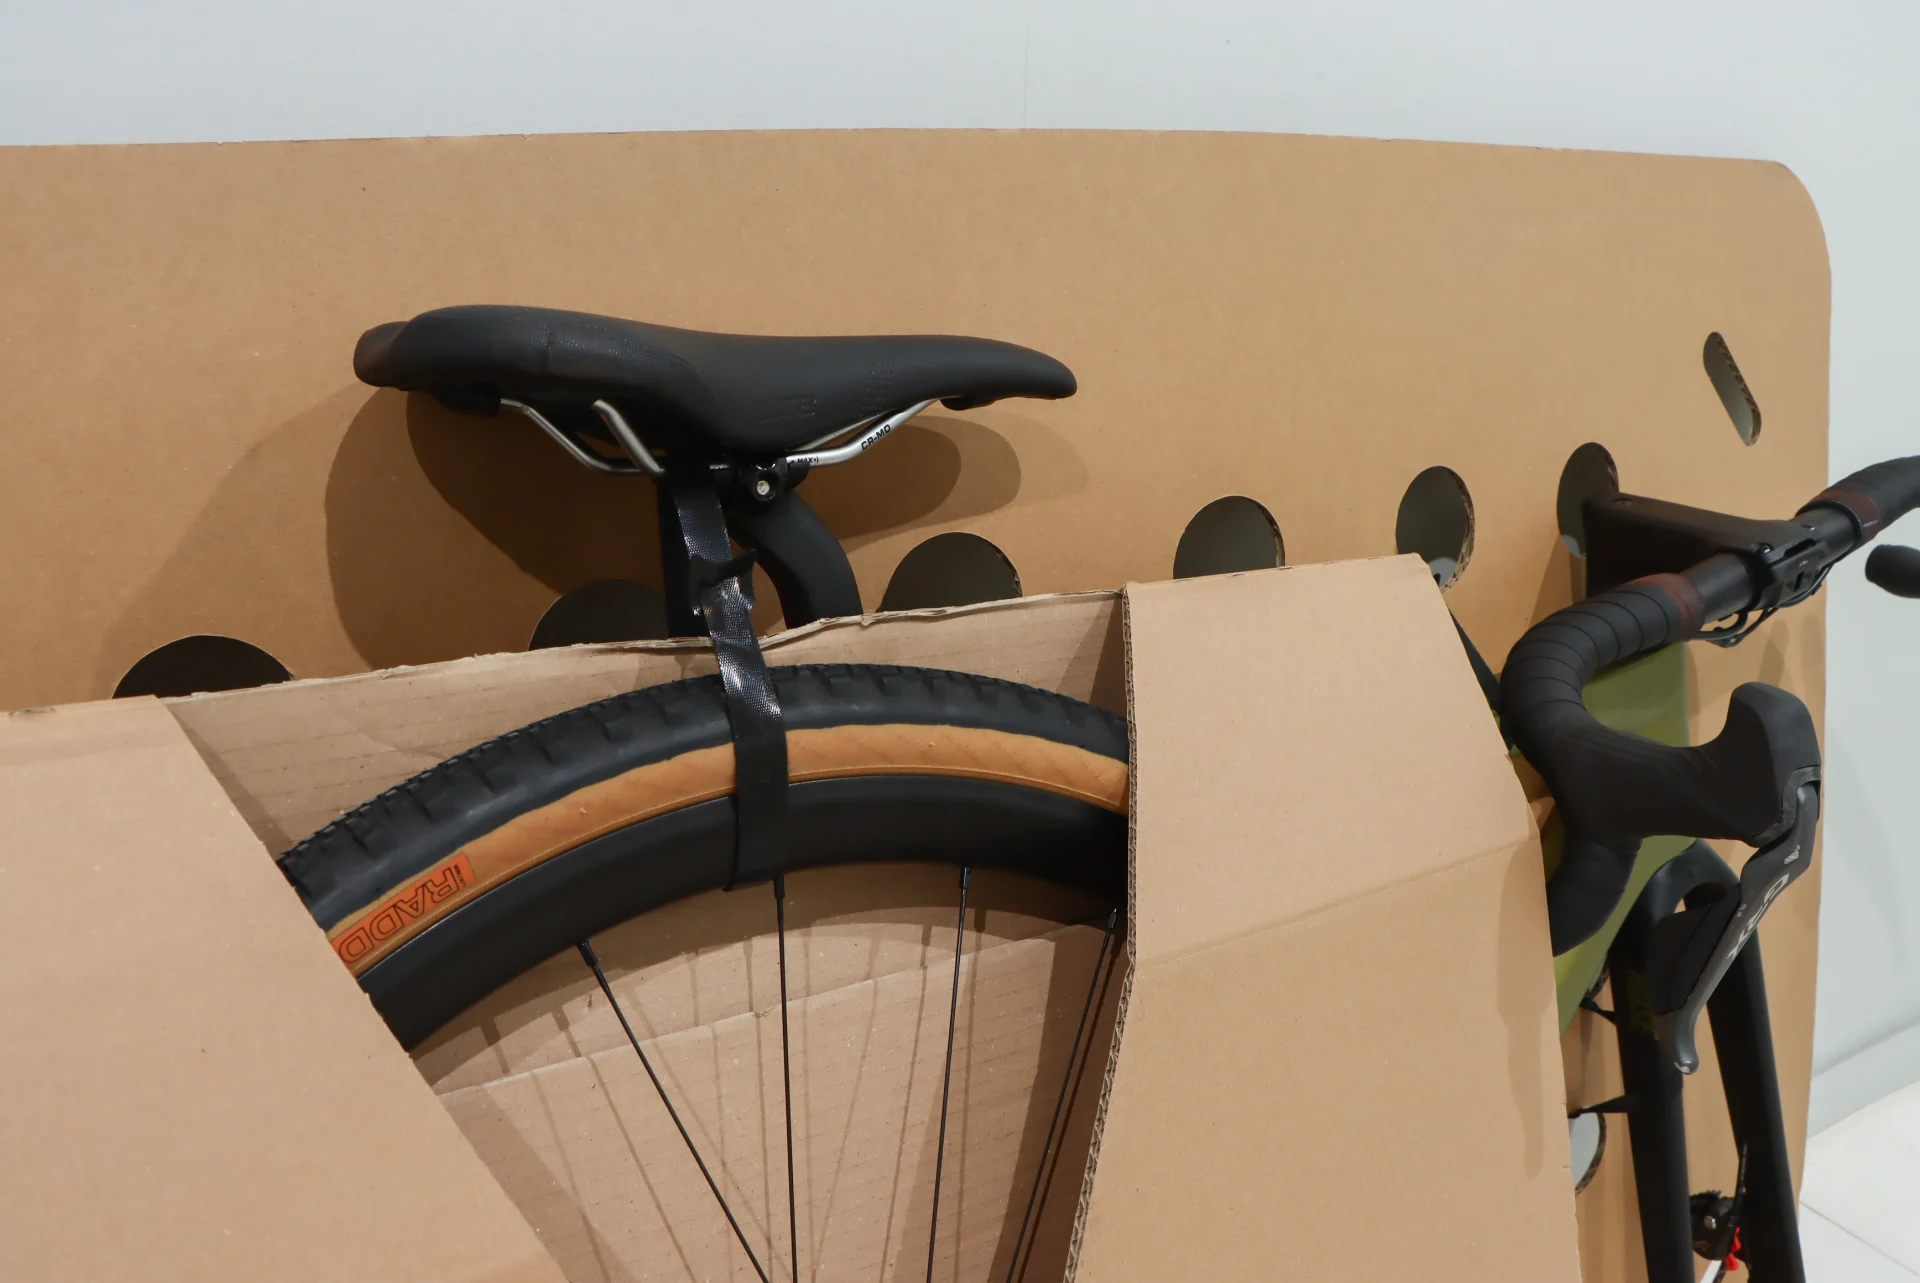
Carefully undo the Velcro fasteners to detach the bike from the perforated cardboard.
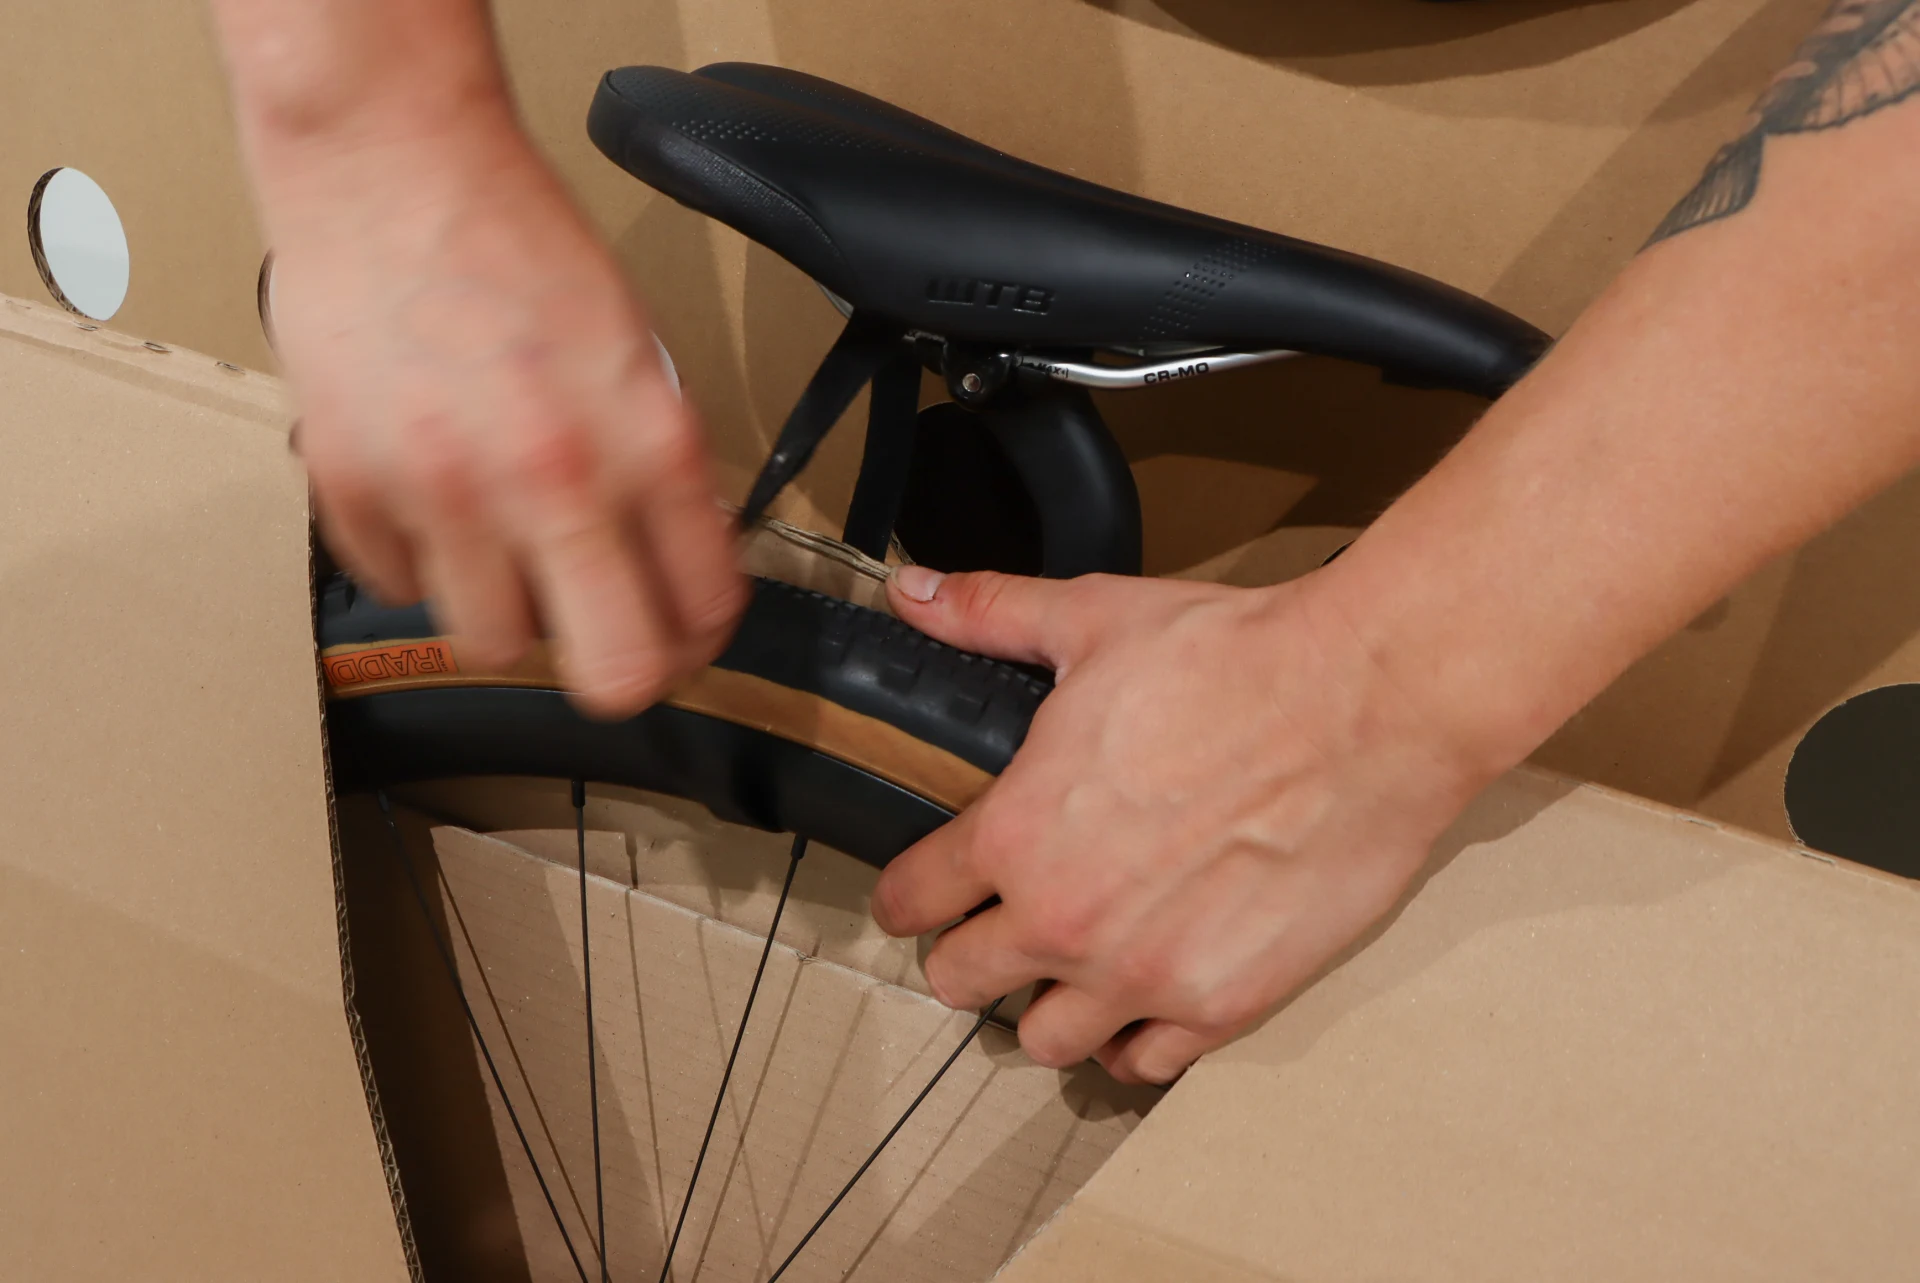
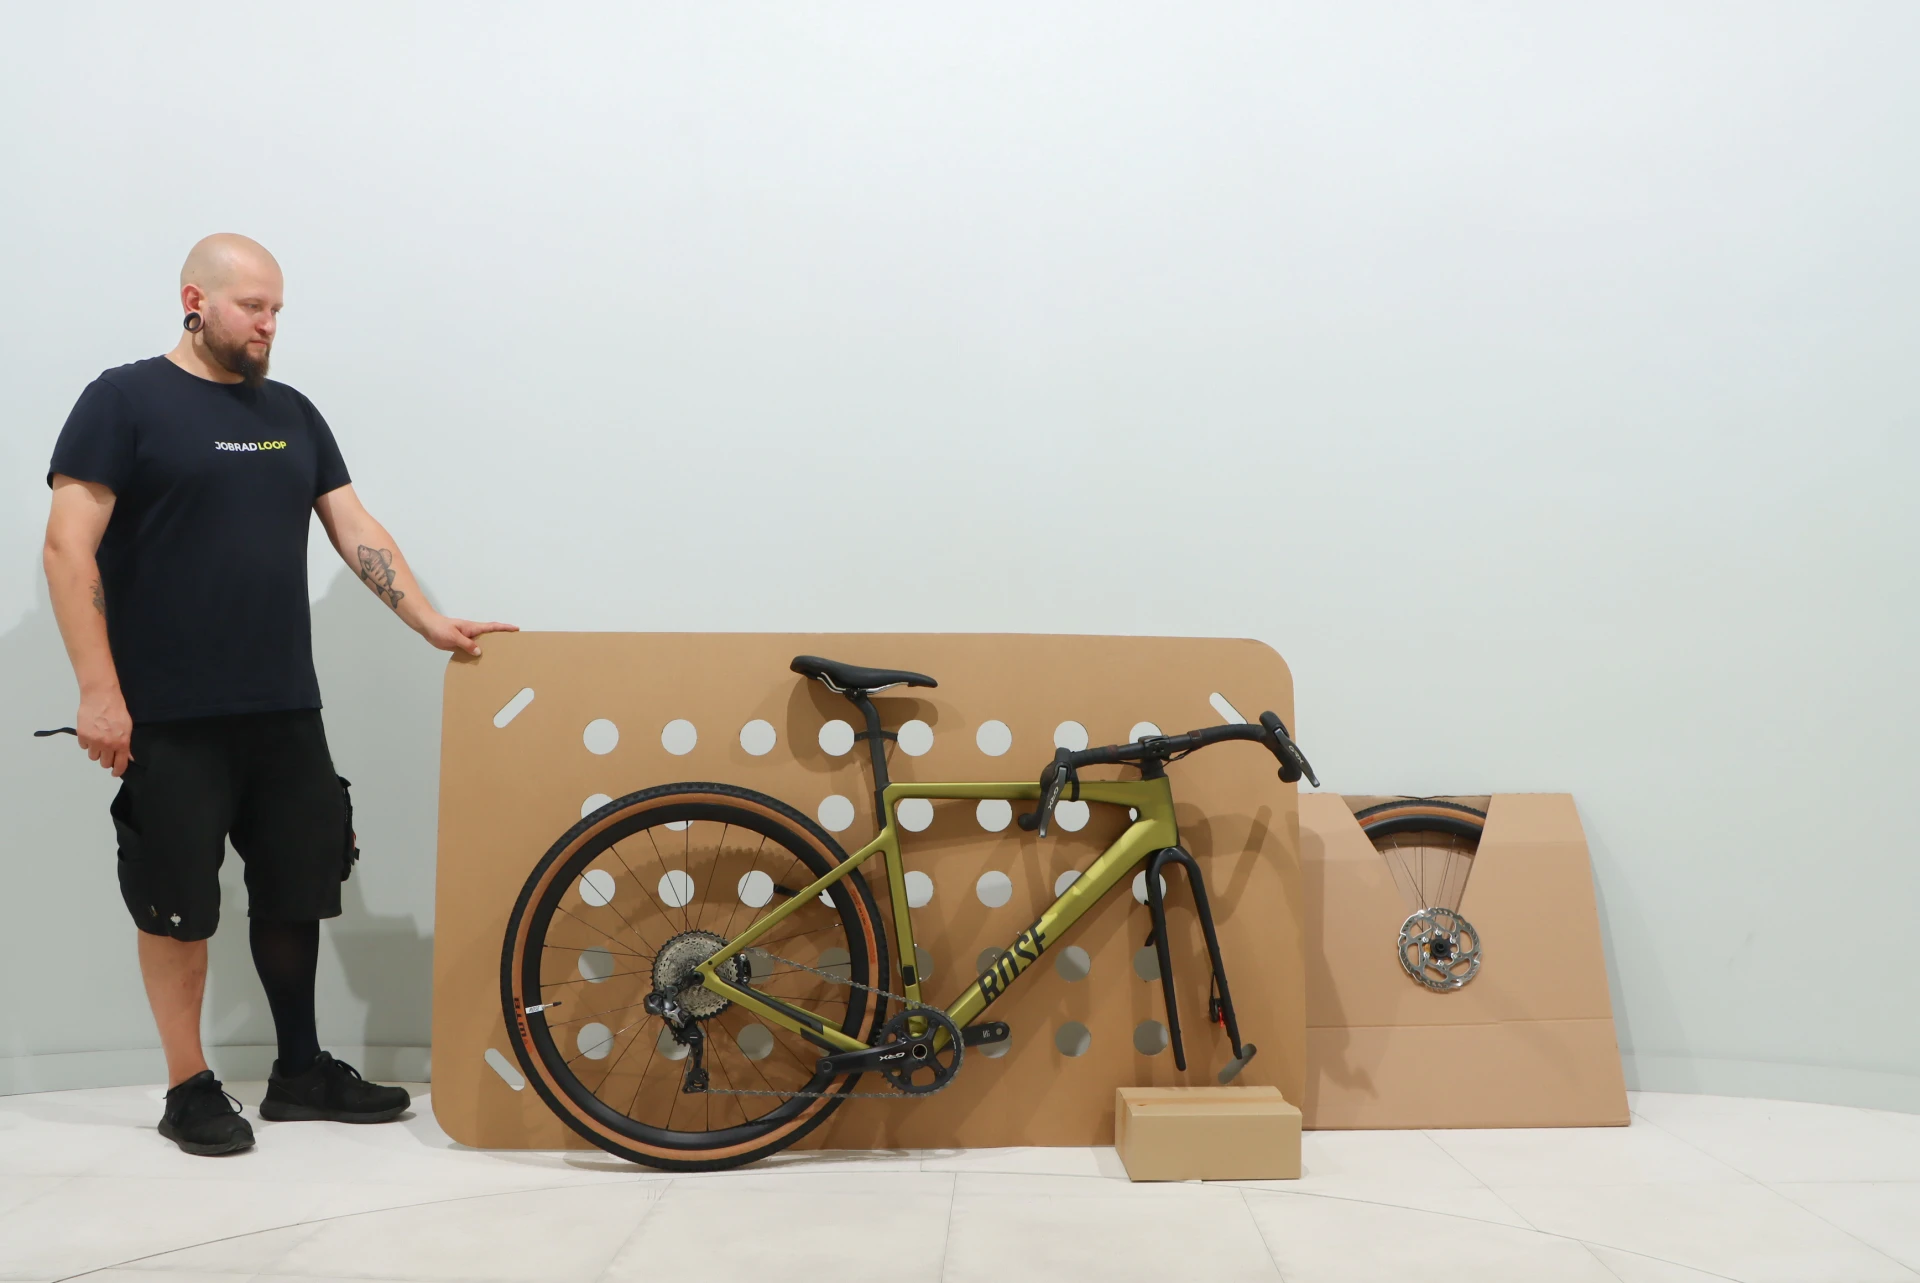
Make sure the bike does not tip over and that the fork is resting on the accessory package. Lean the front wheel against the wall next to the fork, within easy reach.
2. Install front wheel
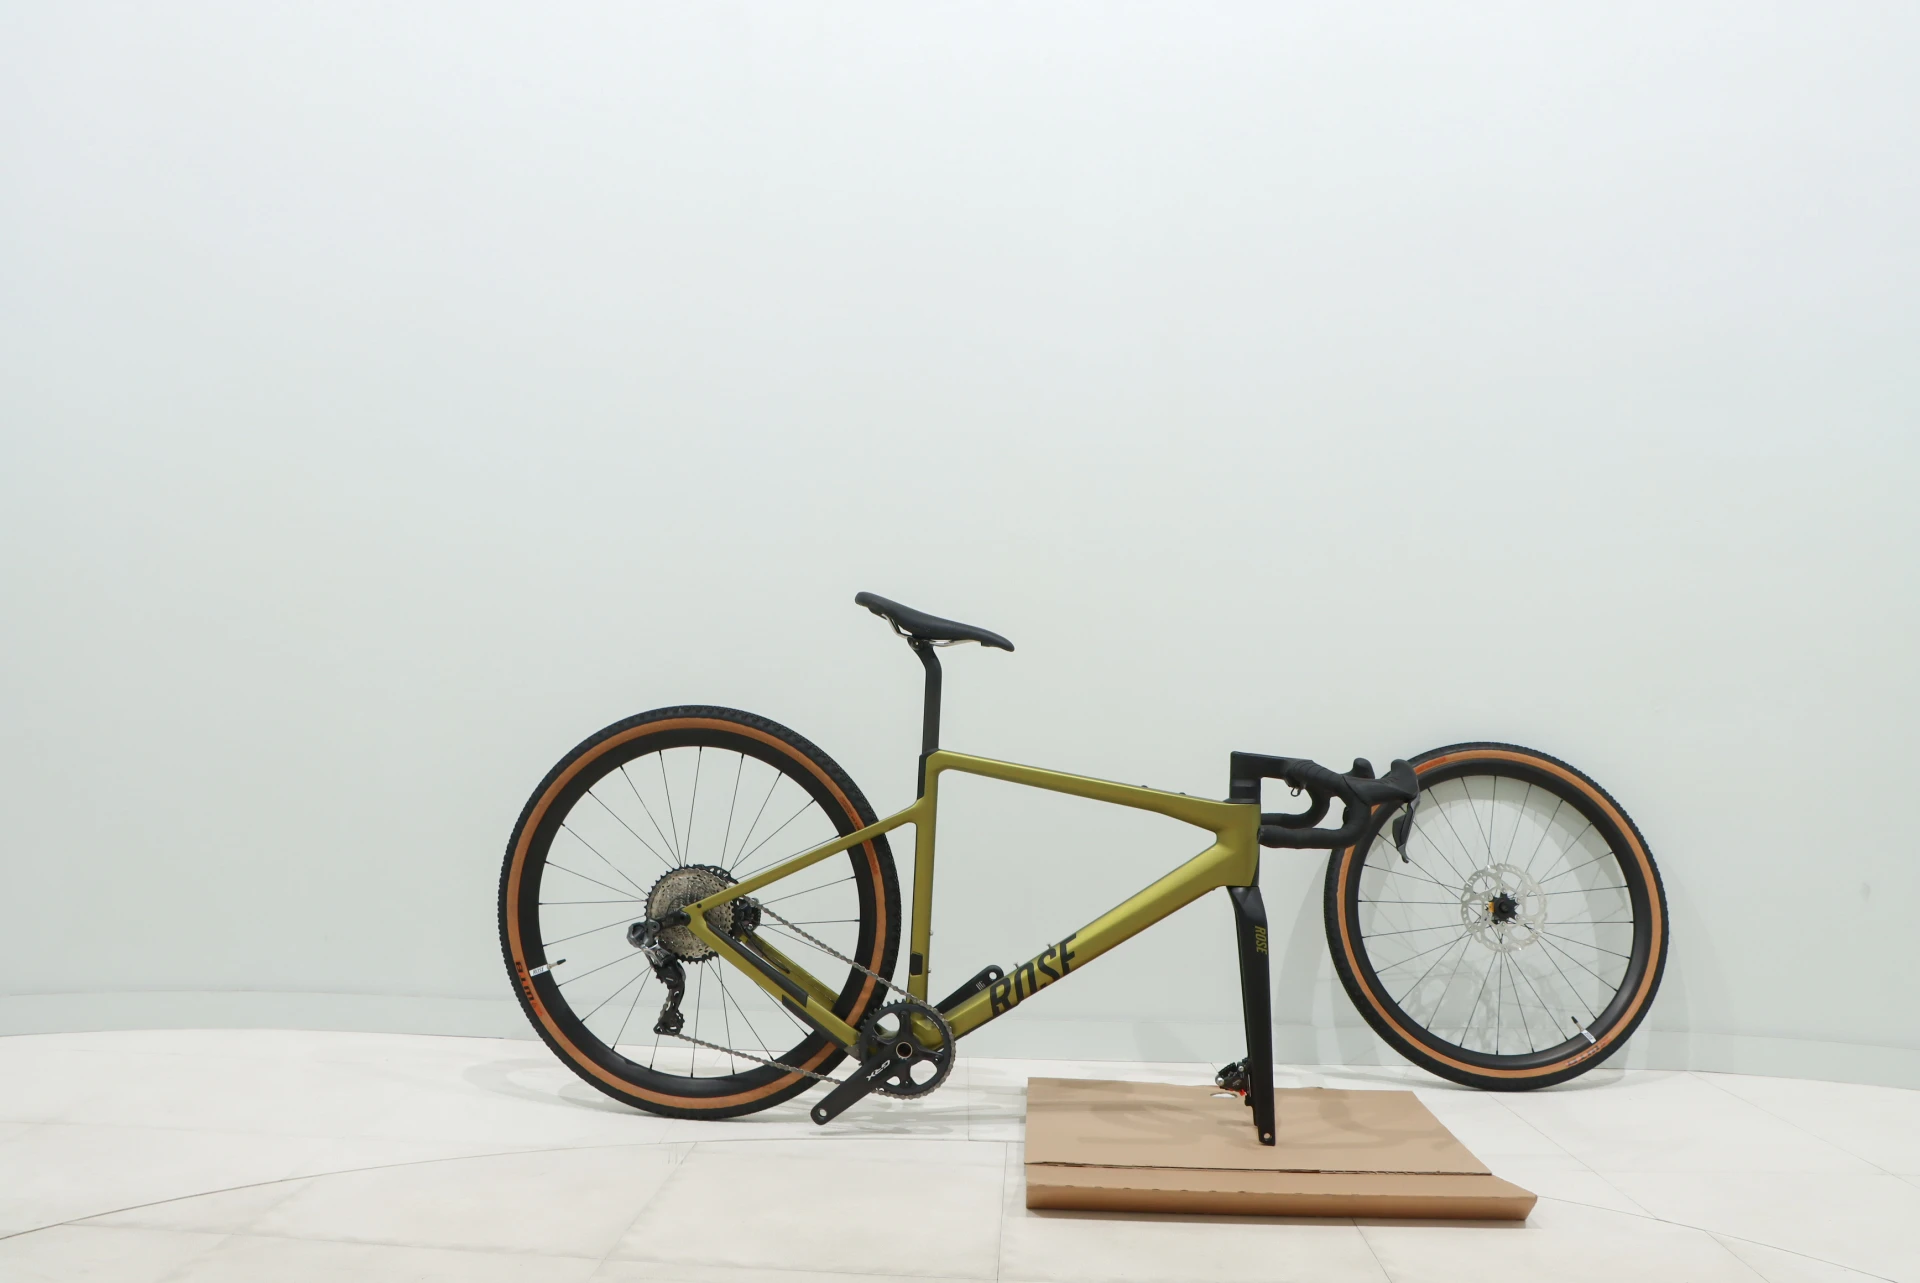
Unpack the front wheel and lean it nearby, within easy reach. Take a piece of cardboard and place it on the floor. Now you can carefully rest the bike's fork on the cardboard.
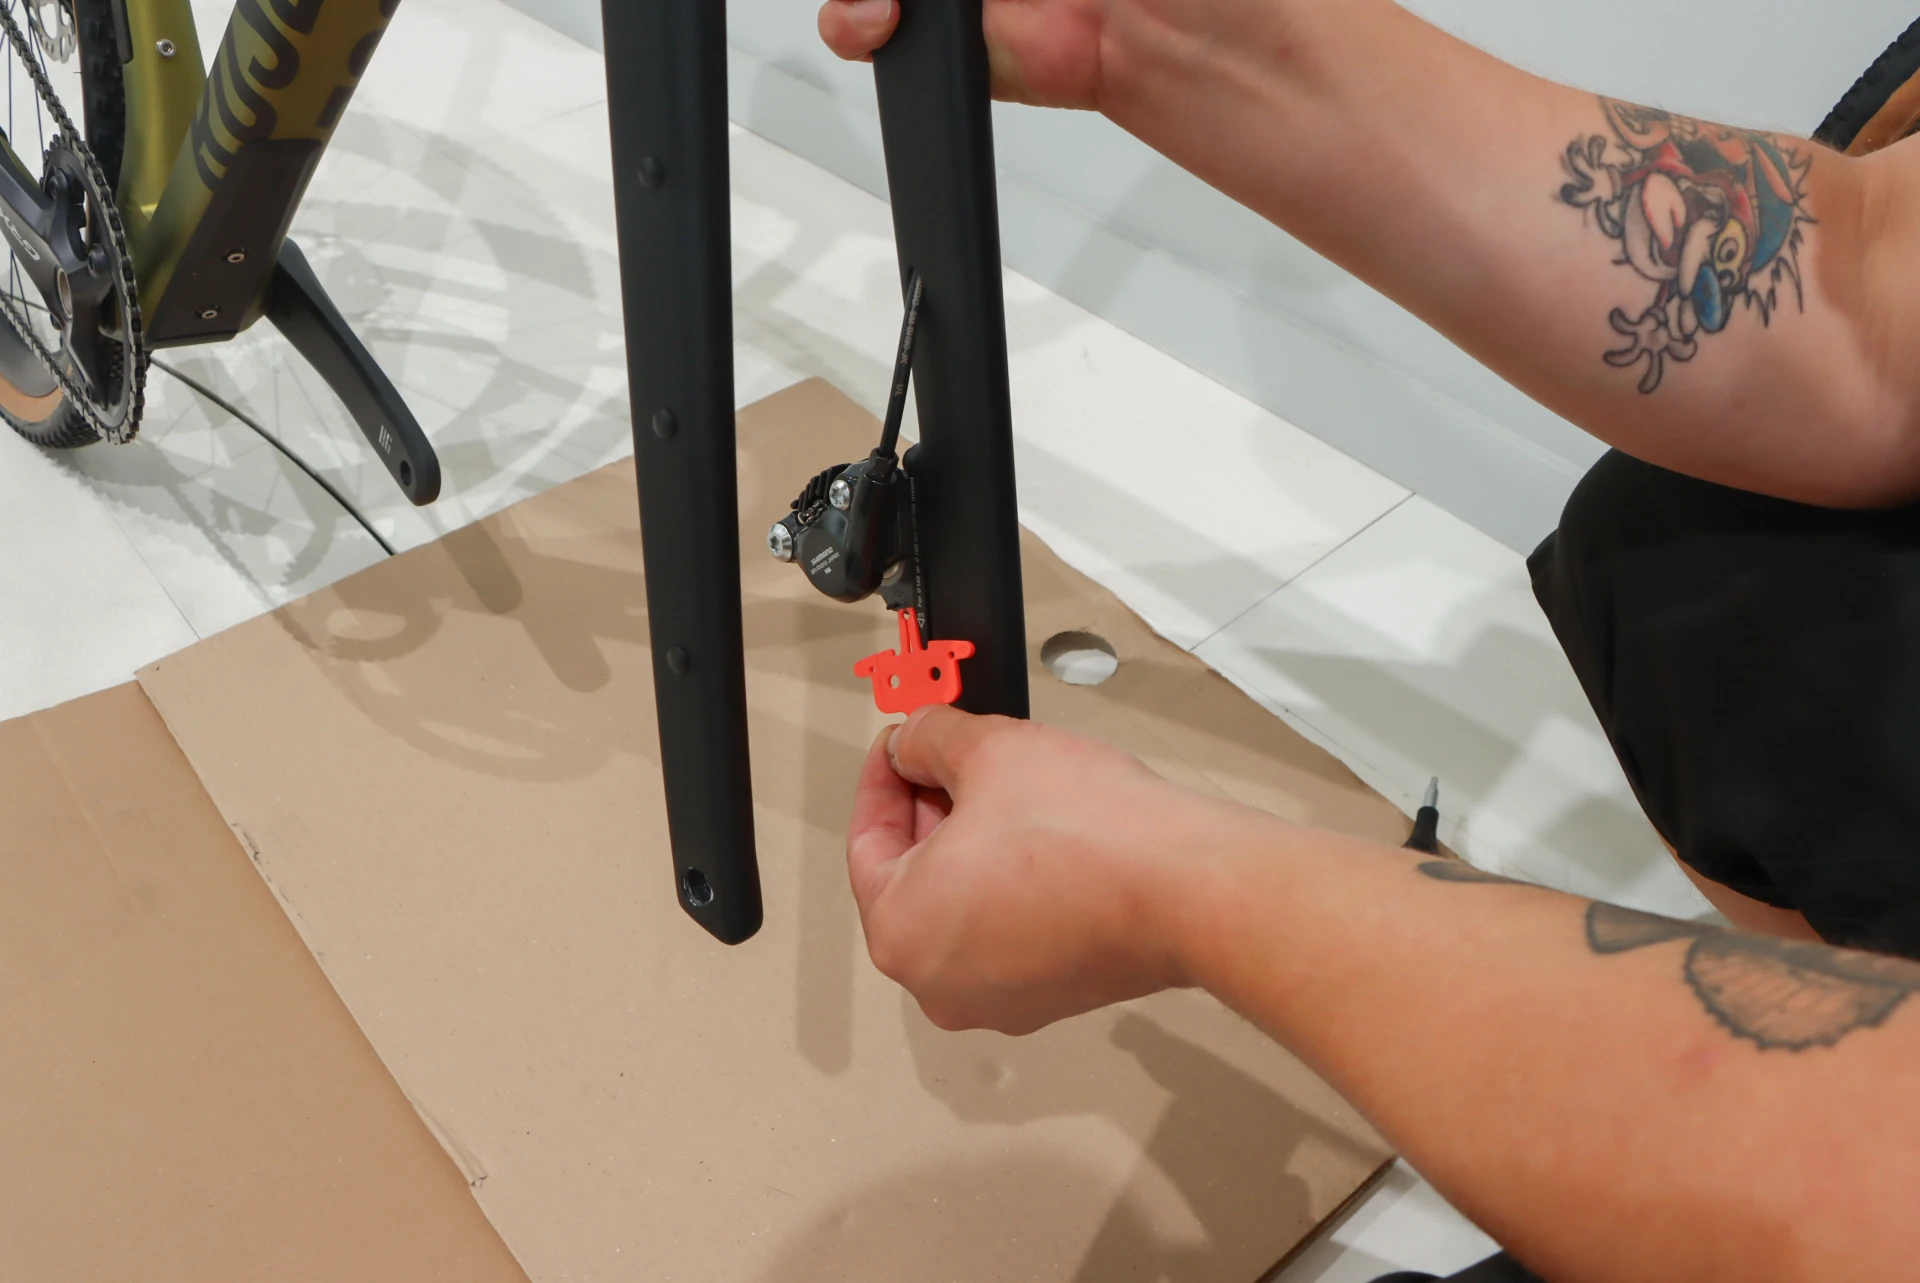
Lift the fork and loosen the axle. Then, pull out the brake guard (a small plastic part).
CAUTION! Do not touch the brake levers! Otherwise, the brake pads will jam irretrievably.
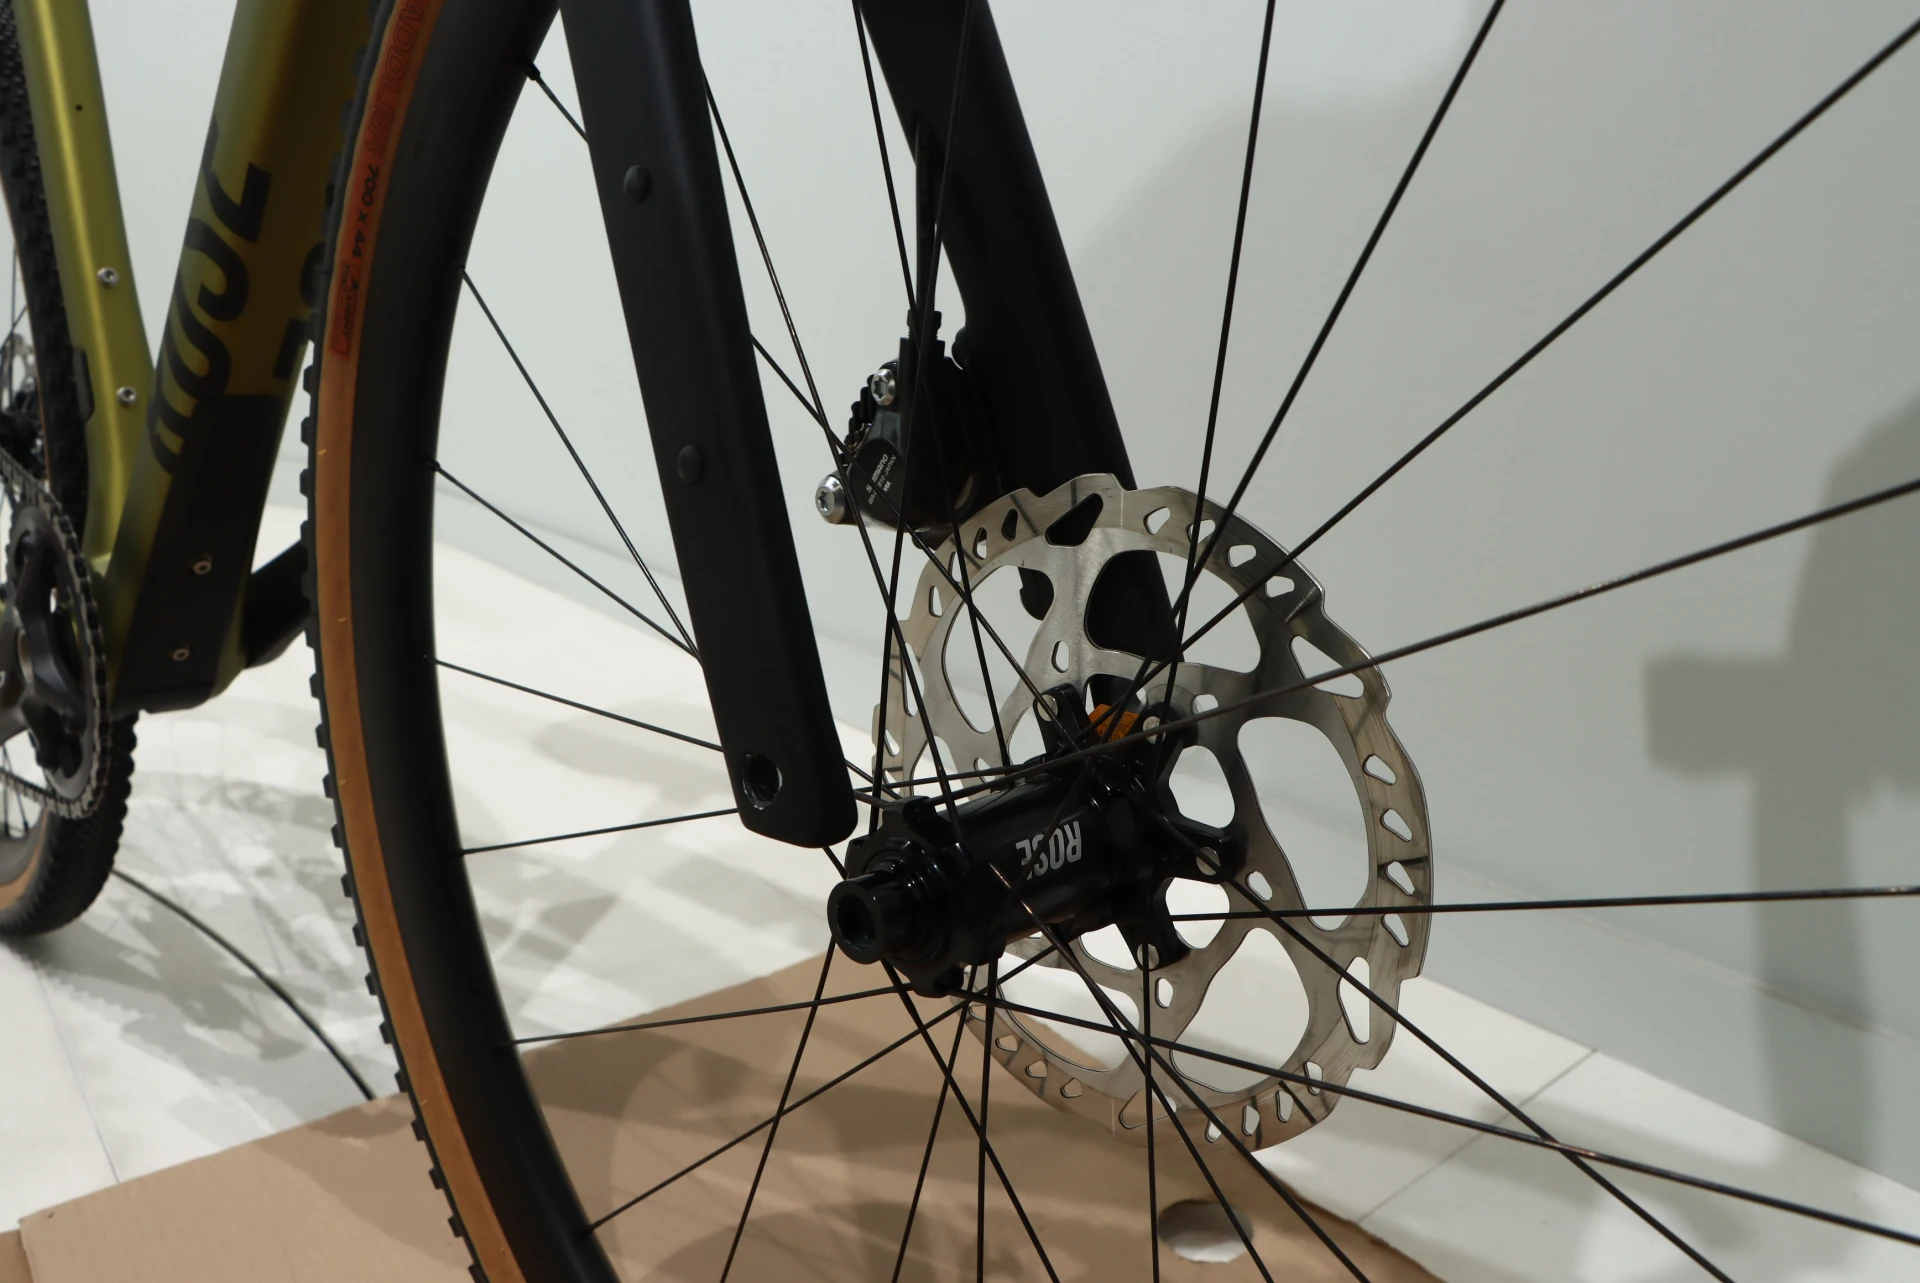
Lift the fork and insert the front wheel; the brake disc on the wheel must be positioned on the same side as the brake on the fork.
Insert the axle and tighten it.
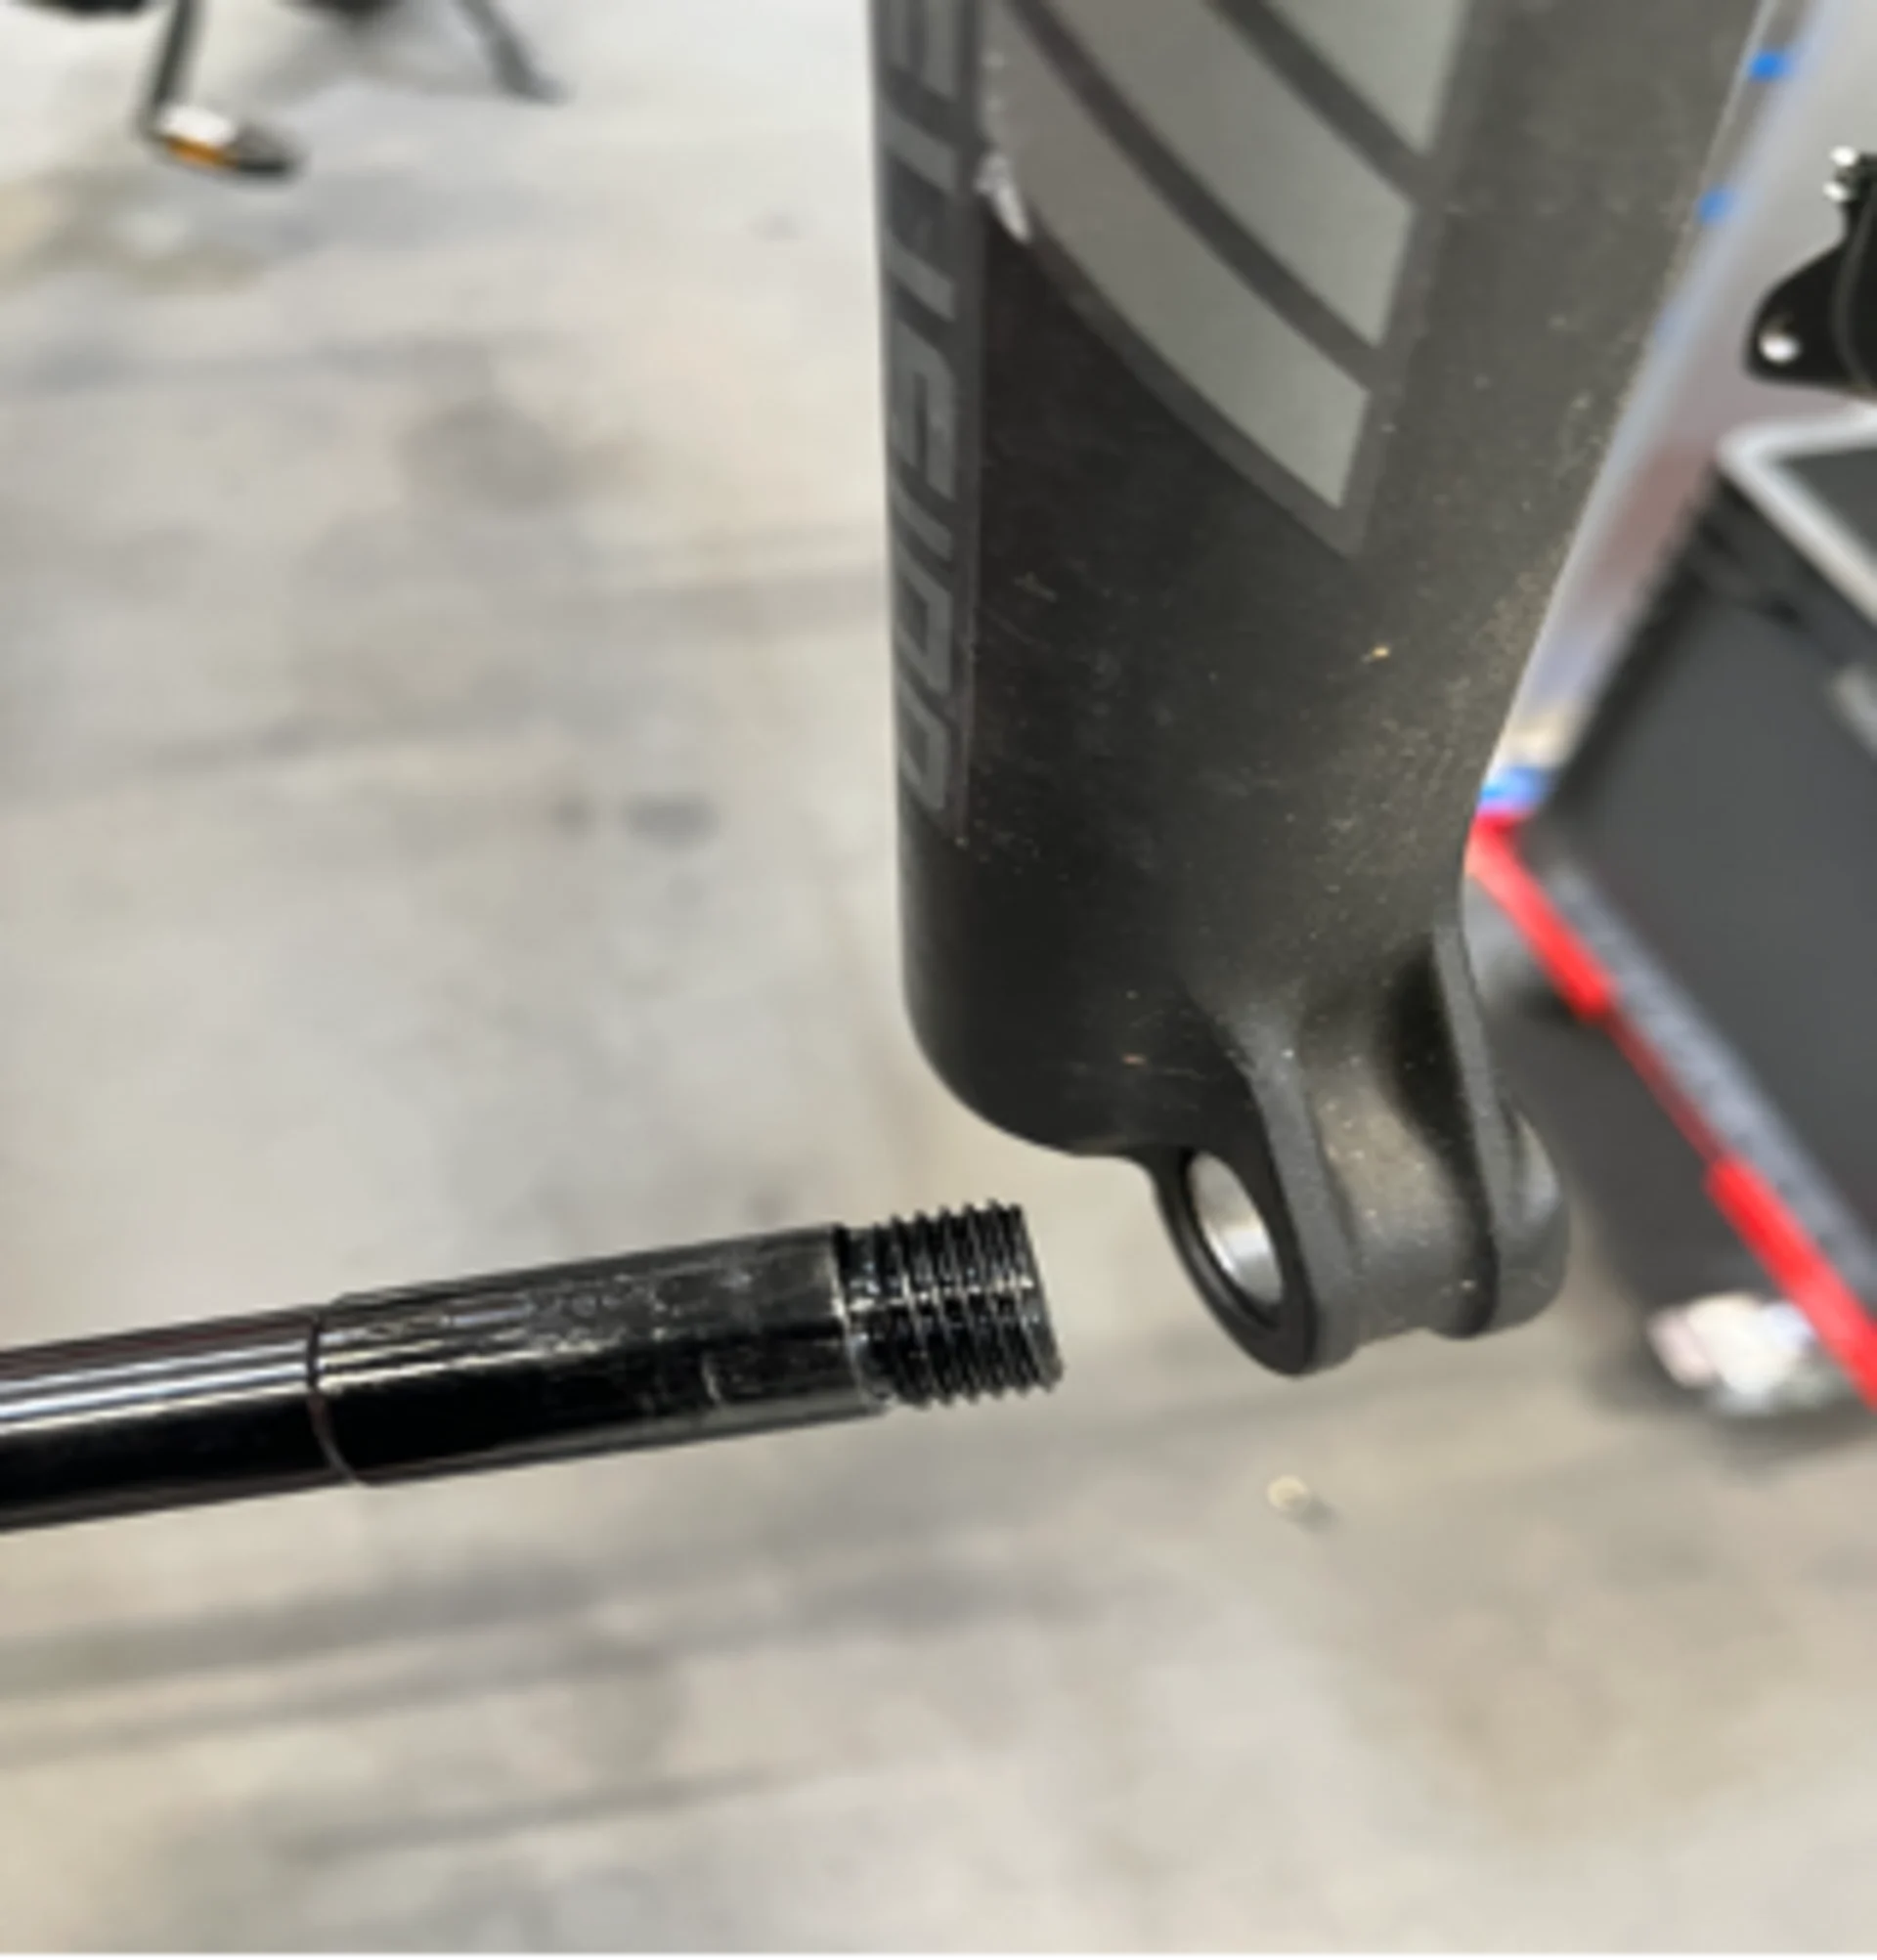
Adjusting the headset
Slide the axle through the wheel and fork,
and screw it in all the way.
The axle should be tightened until snug (hand-tight).
The wheel must be secure and have no play.
For this, you need either an Allen key (or a 15mm open-end wrench for nuts), or there is an integrated lever.
2. Attach the pedals
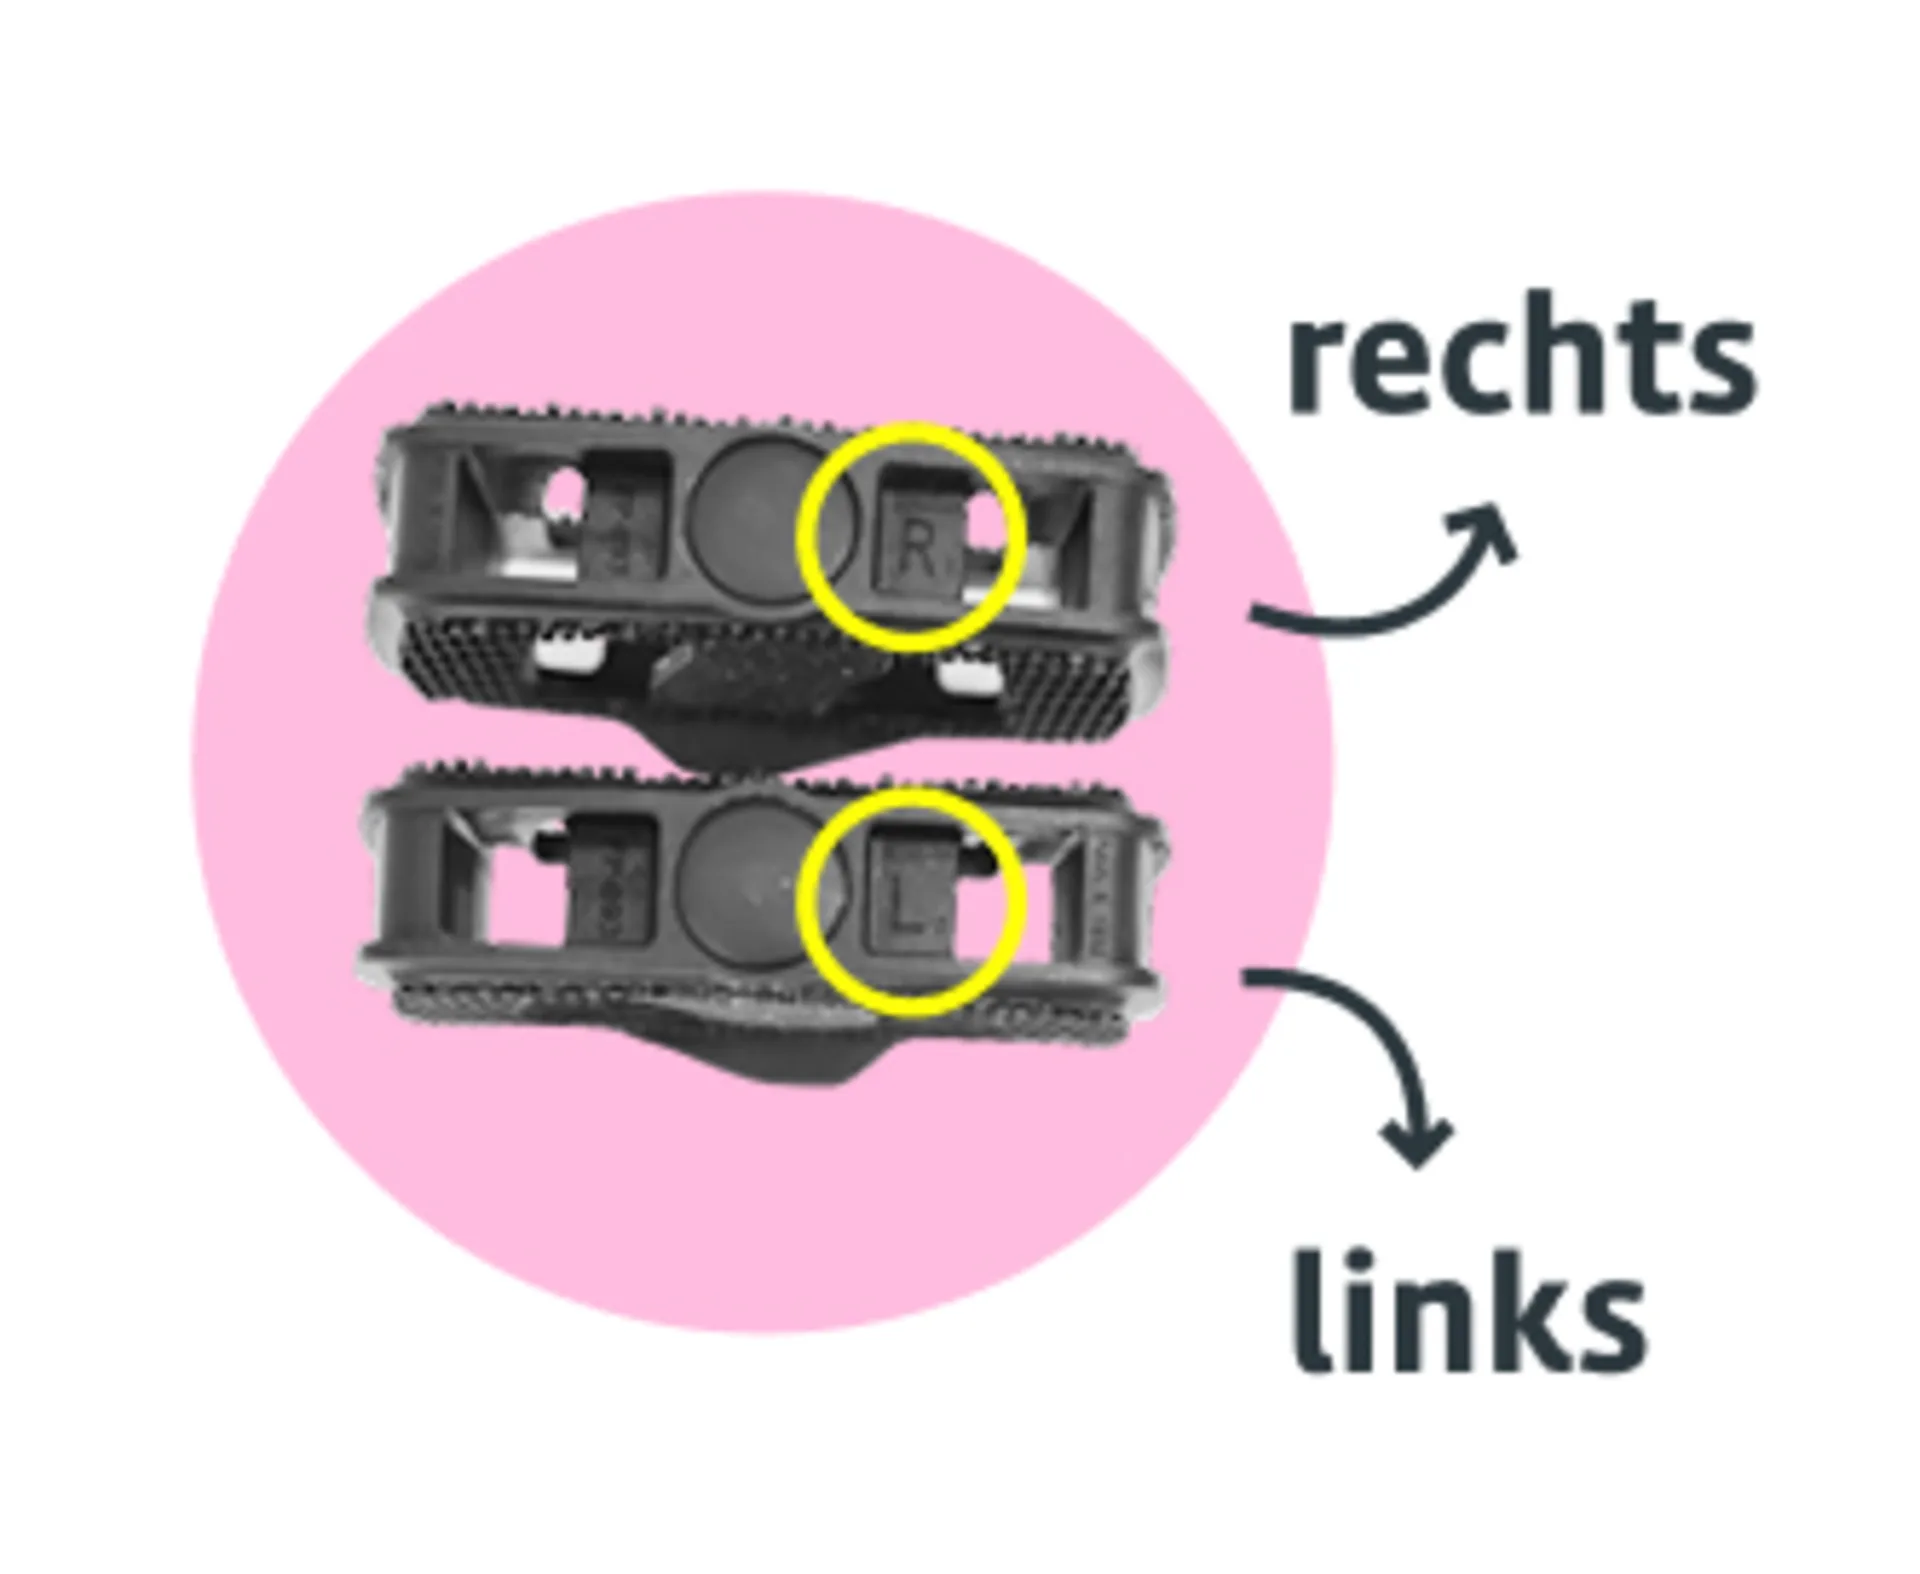
Please note that there is a left and a right pedal.
Applying a little grease (if available) to the threads helps prevent seizing and creaking noises.
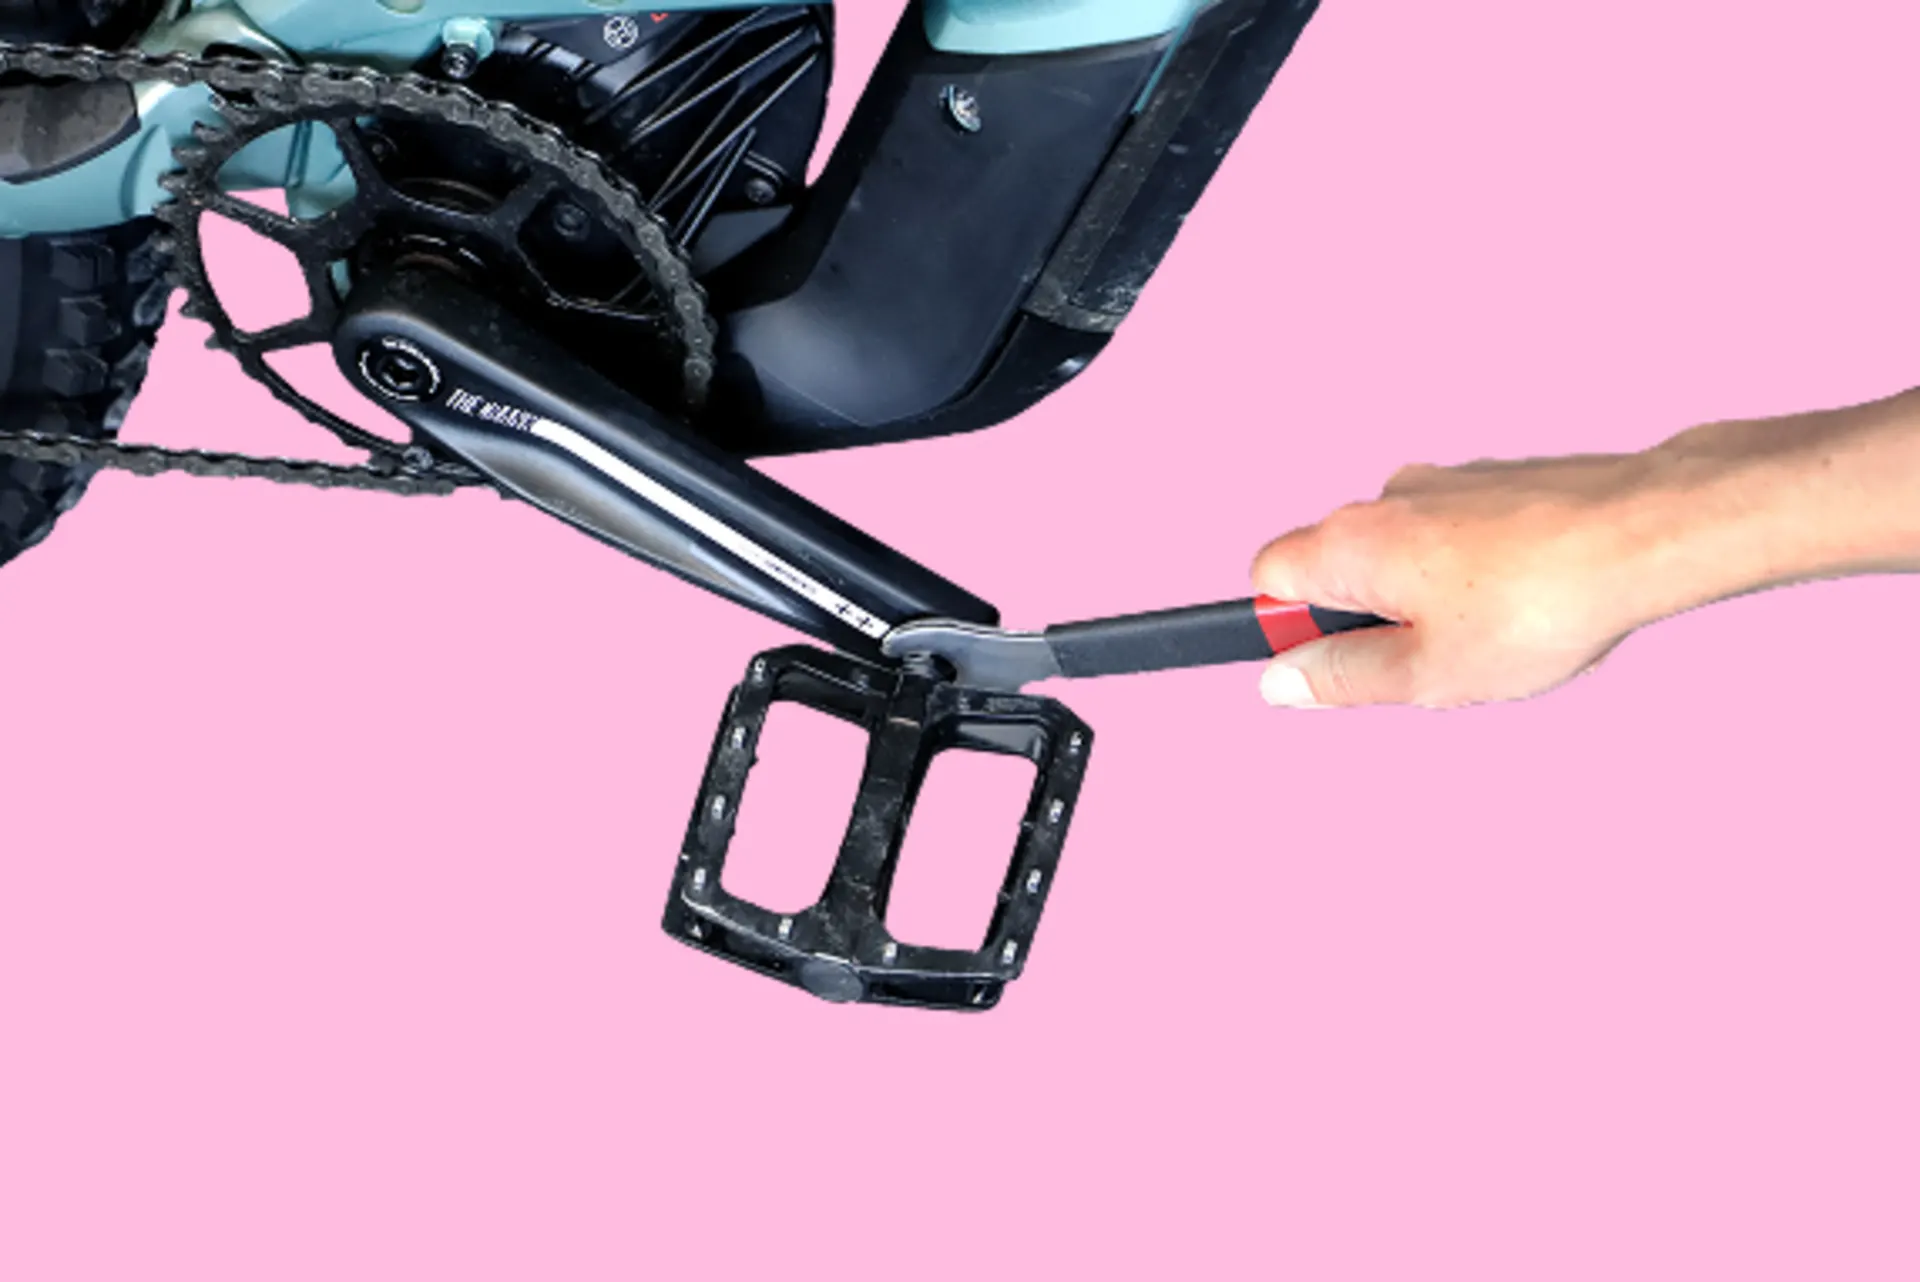
Using a pedal spanner
The pedal marked “R” is screwed clockwise into the right crank arm.
The pedal marked “L” is screwed counterclockwise into the left crank arm.
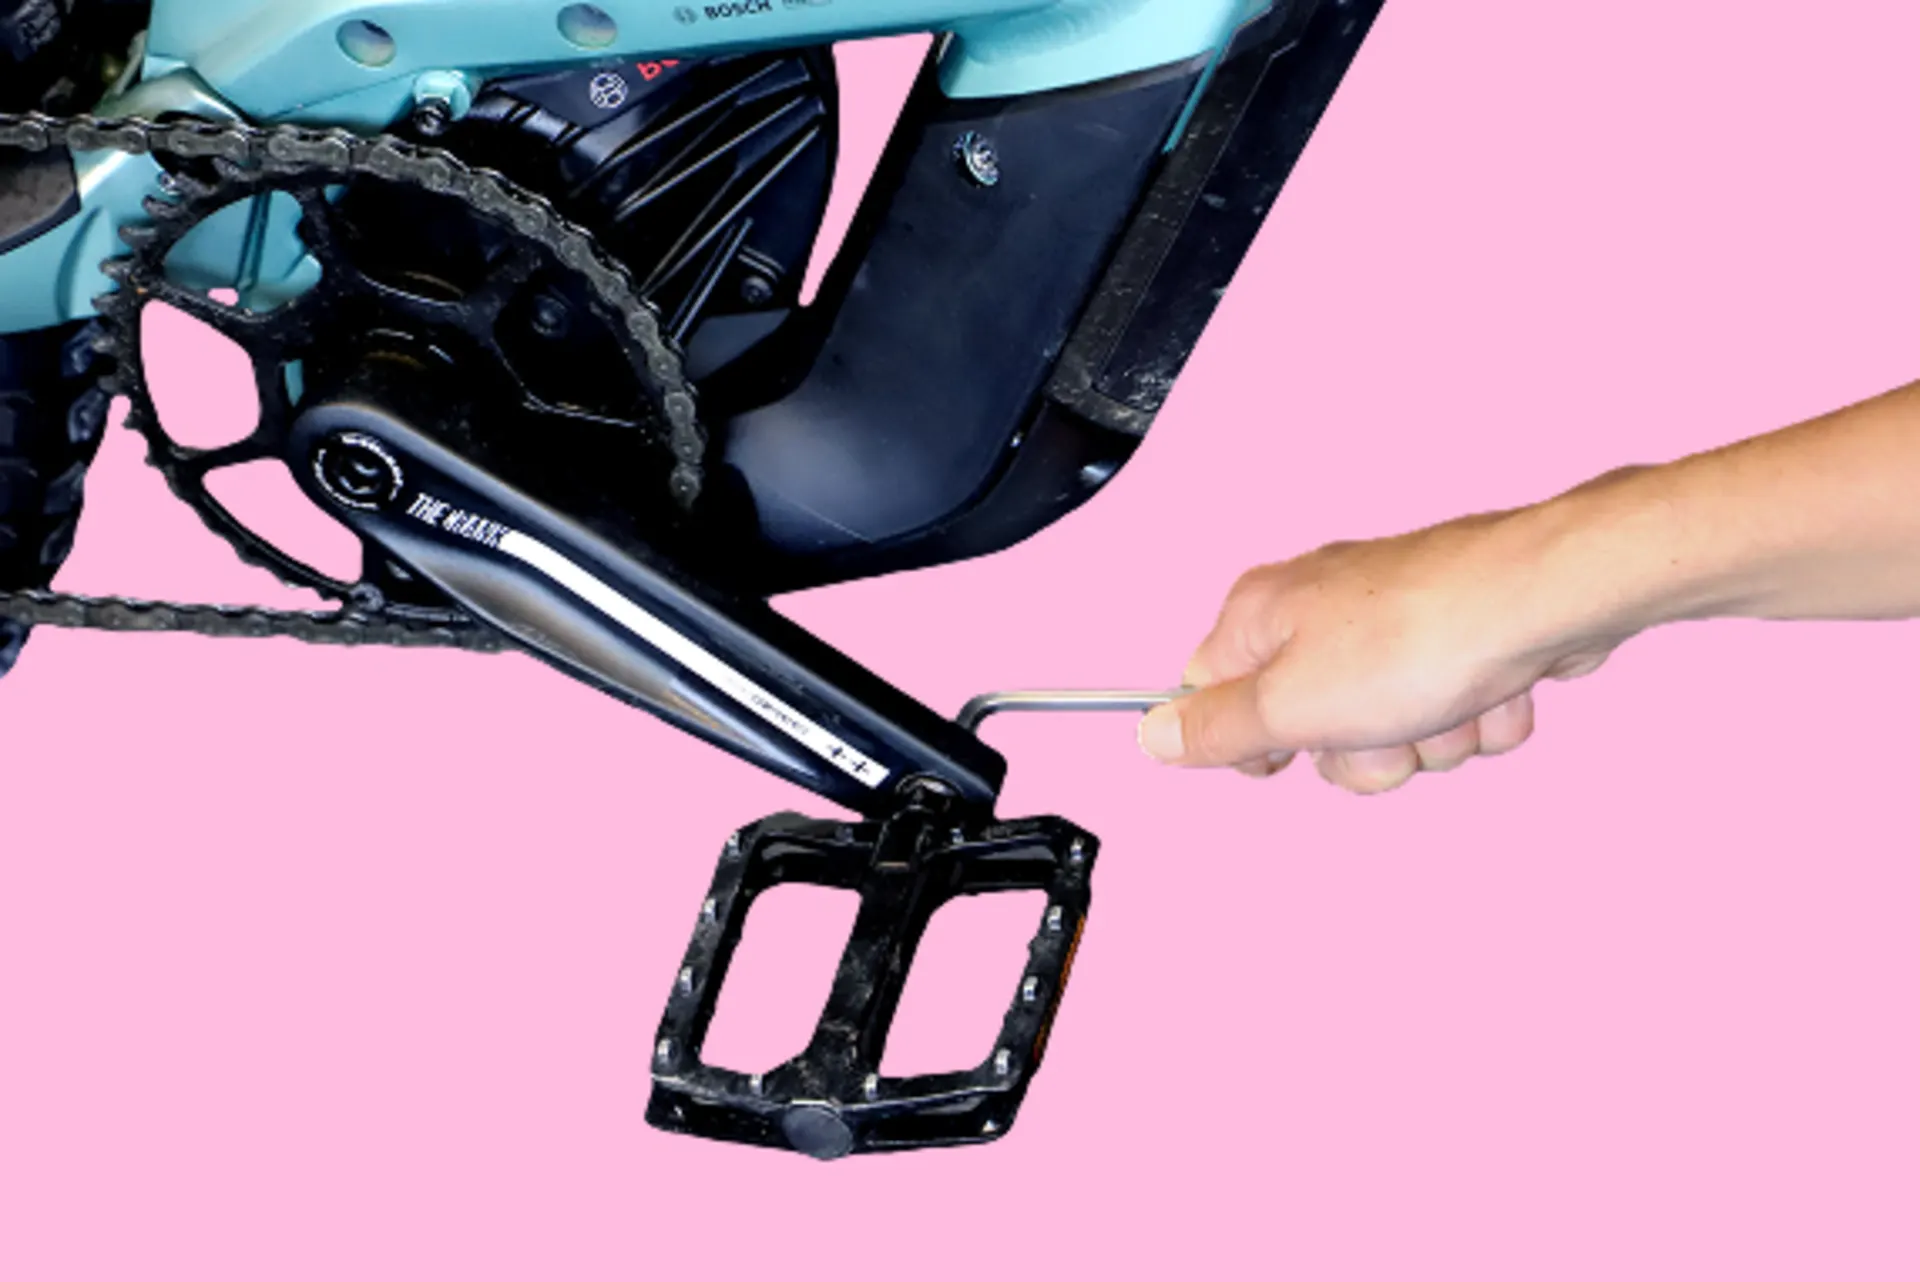
Using an Allen key
For some pedals, you need to use a 6 mm or 8 mm Allen key from the rear of the pedal.
3. Adjust the saddle
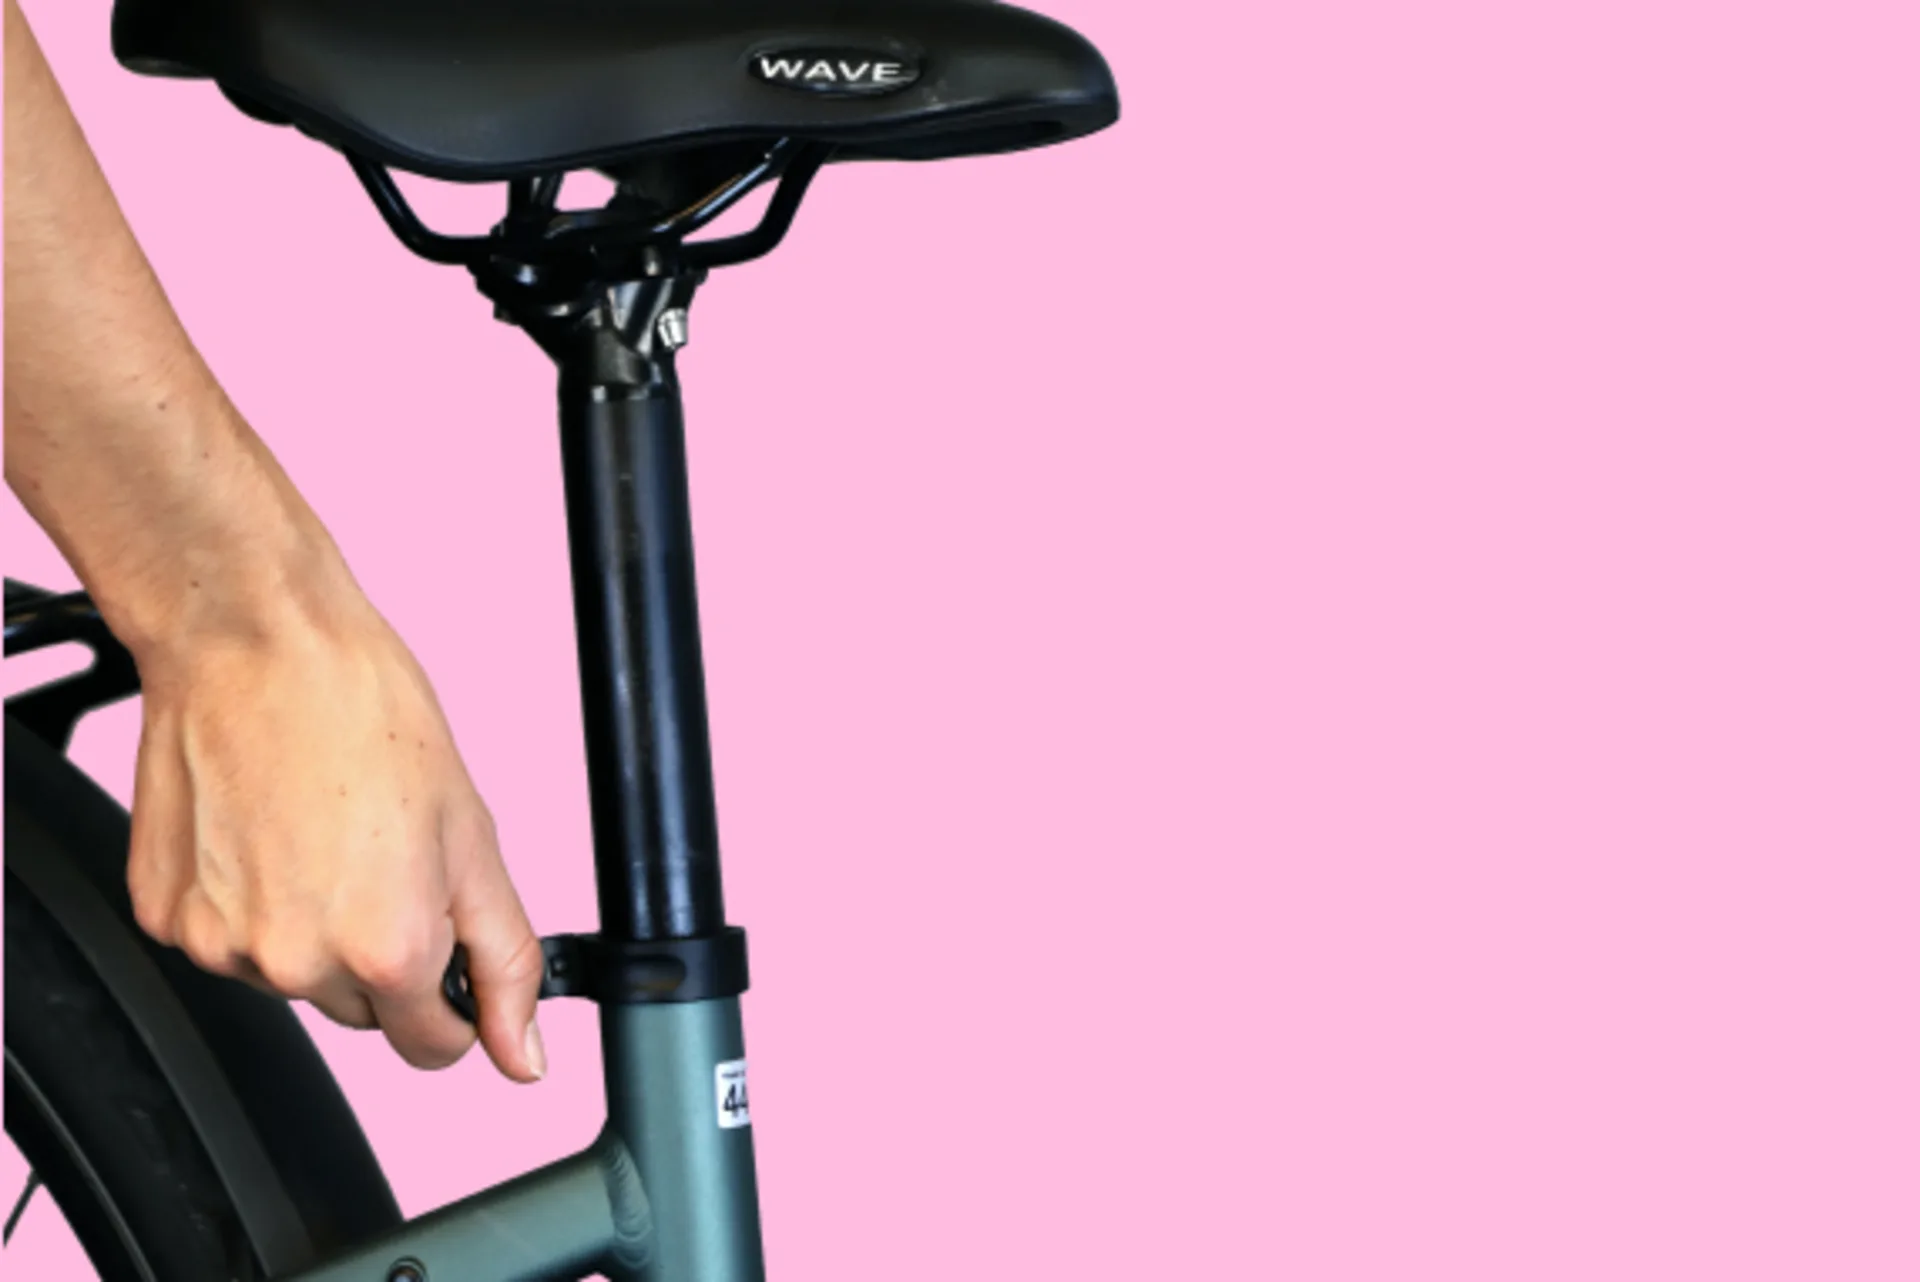
Using the Quick Release
Open the quick release on the seatpost clamp and adjust the seatpost to the desired height. Once you are satisfied with the height and alignment, close the quick release again.
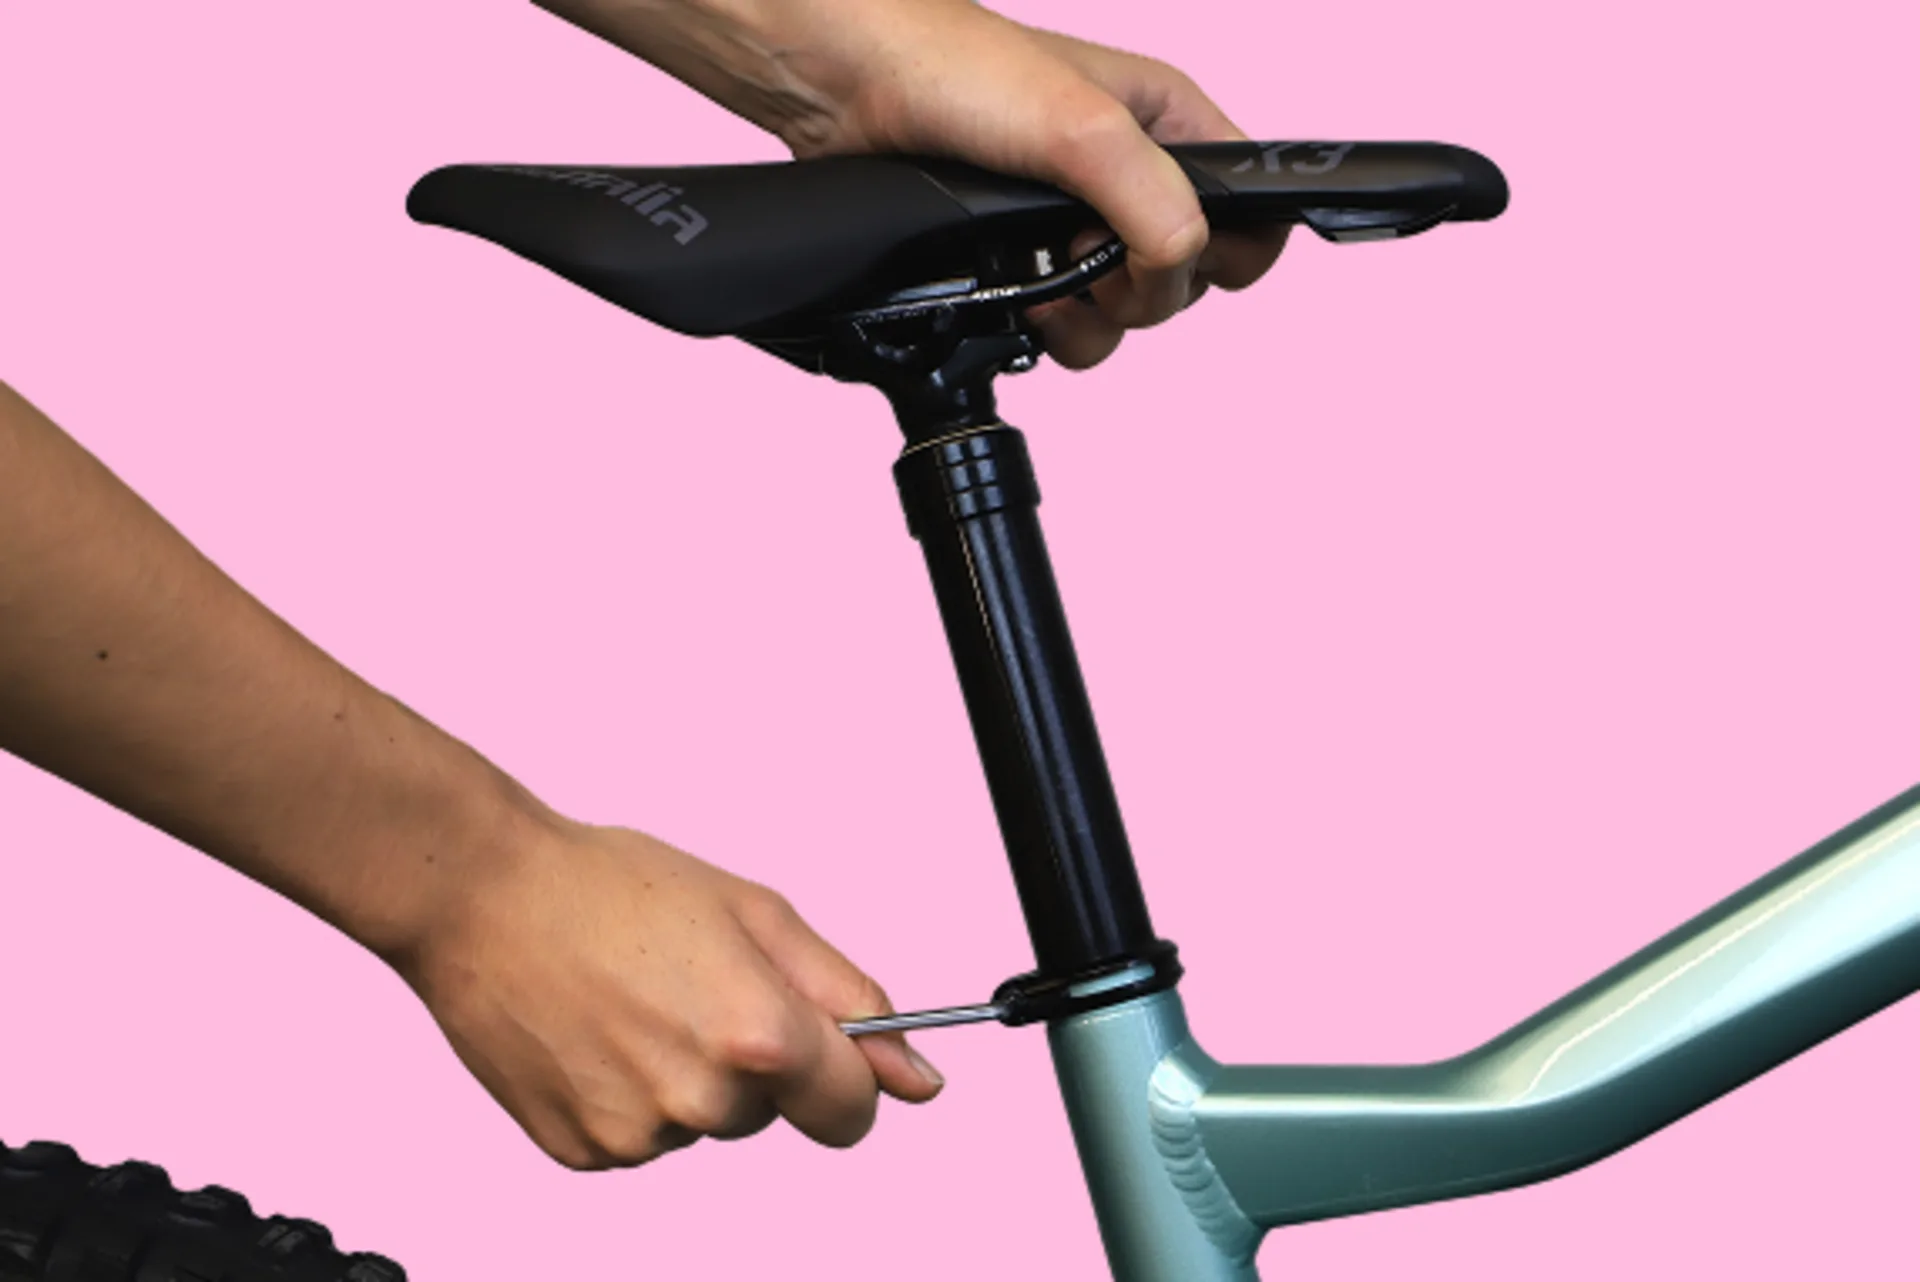
Without Quick Release
Loosen the clamp bolt using the appropriate tool and adjust the seatpost to the desired height. Once you are satisfied with the height and alignment, tighten the clamp bolt again.
Make sure your saddle is properly aligned and level.
To find the right saddle height, start by adjusting the saddle to roughly hip height. This is usually a good initial setting. After a few rides, you will get a better feel for your bike and can fine tune the saddle height if needed.
You did it! Your bike is ready for its first ride!
Did you know you look even better wearing a helmet? So don’t skip it - set a good example and stay safe. We wish you lots of fun on all your cycling adventures, big and small.
Still have questions?
We’re always happy to help.